Spring is almost here and the flowers outside my window are already starting to bloom, which makes today's craft perfect for, well... today!
Duck Tape Rose Pens are a wonderful craft for girls of all ages.I have taught young ladies as young a five years old and they have caught on really fast, and did a splendid job at making one, if I do say so myself :)...
With all of the different colors and patterns of duck tape, the possibilities for these pens can be, well... really endless...
Duck Tape
Ball Point Pen
Scissors
Time: 10 to 15 minutes
-Choosing your duck tape-
For step one choose the color duck tape you want your rose to be...
You will need a roll of duck tape the color of your choosing for your rose and a roll of green duck tape for your rose's stem...
Take the color duck tape that you have chosen and cut a strip off that is 2 1/2 inches long...
Take your strip of duck tape and turn it towards you so that the sticky side is facing you...
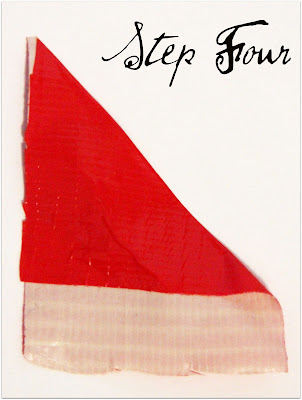
Fold down the right corner of your strip of duck tape like the picture above...
Now take the left corner and fold it down until it looks like the picture above...
Take your pen and cover the top with a piece of duck tape...
The picture above is a chart of the order to stick your duck tape petals (step five).
The black circle in the middle is the top of your pen, the part that you just covered in duck tape.
Stick on one petal at a time... There are only four rows on the chart above but you will add more rows to your pen (the more rows you add the fuller your duck tape rose will be).
The four rows on the chart are a guide line to help you out with your first few rows, after your first four rows you should be able to finish the rest of the rows without a chart.
When your rose is as full as you would like it to be, take your green duck tape and split the beginning piece in half (but don't cut it off yet).
Lay down one side of the split tape and hook the other side to the top of your pen.
Wrap the green duck tape around your pen until it reaches the end, cut and smooth the tape and patch any places at the top that didn't get covered by the tape.
Your duck tape rose is now complete!
I hope you enjoyed this tutorial. If you have any questions or comments please let me know by leaving a comment in the comment box below!
Thanks,
Micaela


